Minggu, 10 November 2024

Amigurumi Pineapple

 Crochet amigurumi pineapple

Abbreviations:
sc: single crochet  
hdc: half double crochet
dc: double crochet
ch: chain
st(s): Stitch(es)


inc : increase
dec: decrease ( 2sctog)
Sl st : slip stitch
R: round/row
Rep: repeat
BLO: back loop only
Bobble: Bobble stitch

Materials:
Polyester yarn in orange and green colors
2 mm crochet hook
keychain
Polyester fiberfill
Tapestry needle

Notes:
This pattern uses US terminology.
This amigurumi is worked in continuous rounds.
Gauge is not important in this project.
Use MR (magic ring) as an alternative of ch 2.
Measurement:  approximately 5 cm.
Skill Level: beginner

Pineapple Body:
Use orange color
R1: ch 2, starting from the second chain from hook, 6 sc (6)
R2: inc, rep 6x (12)
R3: sc, inc, rep 6x (18)
R4: BLO, sc, bobble, rep 9x (18)
R5: sc around
R6: bobble, sc, rep 9x (18)
R7: sc around
R8: sc, bobble, rep 9x (18)
R9: sc, dec, rep 6x (12)
R10: bobble, sc, rep 6x (12)
stuff
R11: BLO, dec, rep 6x (6)
F/O


Leaves:
Use green
Leaf 1 (make 2):
ch 7, starting from the second chain from hook, sl st, sc, hdc, 3 dc
F/O leaving a long tail for sewing
Leaf 2:
Ch 9, starting from the second chain from hook, sl st, 2 sc, 2 hdc, 3 dc
F/O leaving a long tail for sewing
    
Finishing:
Sew the leaves on the top of pineapple.
Attach the key chain to the pineapple.

This pattern is belong to Amigurumi Kitchen, Zan Merry. Please do not claim this pattern as your own. If you wish to share this pattern, you may link this pattern but please do not reprint it to your site. You may keep a copy of this pattern for personal use but you may not sell this pattern. You can sell the items that you made from this pattern.
Please leave comment if you have a question or find any mistake in my pattern. I will do the corrections and answer your question as soon as possible.

Minggu, 01 Agustus 2021

Roasted Chicken

 Mini amigurumi  food


<

This Pattern uses US terminology. Gauge is not important in this pattern.
Skill Level: beginner

Abbreviations:
sc: single crochet    
ch: chain
st: stitch
inc : increase
dec: decrease
hdc: half double crochet
CC: change color
F/O: Fasten off
sl st: slip stitch
 

 Materials:
2 mm crochet hook for 3ply yarn or 3 mm for 5ply yarn
Milk cotton yarn in rust color or dark brown, white and any color you like
Tapestry needle for sewing
Stuff
Scissor

Note: work in continuous rounds.  

Body:
Use rust color yarn
R1:  ch 2, starting from the second chain from hook, 6 sc   (6)
R2: inc, rep 6x  (12)
R3: sc, inc, rep 6x (18)
R4: 8 sc, inc, rep 2x (20)
R5-6: sc around
R7: 8 sc, dec, rep 2x (18)
R8: 7 sc, dec, rep 2x (16)
R9: 6 sc, dec, rep 2x (14)
stuff
R10: 5 sc, dec, rep 2x (12)
R11: sc around
R12: dec, rep 6x (6)
F/O

Legs (make 2):
Use rust color yarn
R1:  ch 2, starting from the second chain from hook, 6 sc   (6)
R2: inc, rep 6x  (12)
R3: 2 sc, dec, rep 3x (9)
stuff
R4: sc, dec, rep 3x (6)
R5: CC white, sc around (6)
R6: sc, dec, rep 2x (4)
F/O
 
Wings (make 2):
Use rust color yarn, Ch 7, starting from the second chain from hook, sc, hdc, dc-inc, hdc, sc, sl st
F/O

Platter:
use any color you like
R1: Ch 9, starting from the second chain from hook, 7 sc, 3 sc in the corner, 6 sc, inc (18)
R2: inc, 6 sc, 3 inc, 6 sc, 2 inc (24)
R3: sc, inc, 7 sc, inc, (sc, inc, rep 2x), 7 sc, inc, sc, inc (30)
R4: 2 sc, inc, 8 sc, inc, (2 sc, inc, rep 2x), 8 sc, inc, 2 sc, inc (36)
R5: 5 sc, inc, rep 6x (42)
R6: sc around
R7: sl st around
F/O
 
    
Finishing:

Sew wings and legs on the body of the chicken, and put the the chicken on the platter


This pattern is belong to Amigurumi Kitchen, Zan Merry. Please do not claim this pattern as your own. If you wish to share this pattern, you may link this pattern but please do not reprint it to your site. You may keep a copy of this pattern for personal use but you may not sell this pattern. You can sell the items that you made from this pattern.
Please leave comment if you have a question or find any mistake in my pattern. I will do the corrections and answer your question as soon as possible.

Follow  Zan Merry:
Facebook: https://www.facebook.com/zan.amigurumi/
Instagram: https://www.instagram.com/zancrochet/
Ravelry: https://www.ravelry.com/designers/zan-merry
Pinterest: https://www.pinterest.com/zancrochet/

Rabu, 18 Maret 2020

Mini Cake

Very simple and super easy crochet cake. By using 5ply yarn and 3 mm crochet hook the size of this cake is about 6.5cm x 4.5cm, or 3ply yarn and 2 mm  is about 4 cm x 3 cm.


This Pattern uses US terminology. Gauge is not important in this pattern.
Skill Level: beginner

Abbreviations:
sc: single crochet    
ch: chain
st: stitch
inc : increase
dec: decrease
BLO: back loop only
CC: change color
F/O: Fasten off

Materials:
2 mm crochet hook for 3ply yarn or 3 mm for 5ply yarn
Milk cotton yarn in white, brown and red
Tapestry needle for sewing
Stuff
Scissor

Note: work in continuous rounds.

Cake:
Using white yarn
R1: ch 2, starting from second chain from hook, 6 sc (6)
R2: inc, rep 6x (12)
R3: sc, inc, rep 6x (18)
R4: sc, inc, [2 sc, inc = rep 5x], sc (24)
R5: 3 sc, inc, rep 6x (30)
R6: 2 sc, inc, [4 sc, inc = rep 5x], 2 sc (36)
R7: BLO, sc around
R8-9: sc around
R10: CC to brown, sc around
R11-12: CC to white, sc around
R13: BLO, 4 sc, dec, rep 6x (30)
R14: 3 sc, dec, rep 6x (24)
R15: 2 sc, dec, rep 6x (18)
stuff
R16: sc, dec, rep 6x (12)
R17: dec, rep 6x (6)
F/O

Cherry (make 6):
Use red yarn
R1: ch 2, starting from second chain from hook, 5 sc (5)
R2: sc around
F/O leaving along tail for sewing.

Finishing:
  • Sew all the cherries on the top of cake.
This pattern is belong to Amigurumi Kitchen, Zan Merry. Please do not claim this pattern as your own. If you wish to share this pattern, you may link this pattern but please do not reprint it to your site. You may keep a copy of this pattern for personal use but you may not sell this pattern. You can sell the items that you made from this pattern.
Please leave comment if you have a question or find any mistake in my pattern. I will do the corrections and answer your question as soon as possible.

Follow  Zan Merry:
Facebook: https://www.facebook.com/zan.amigurumi/
Instagram: https://www.instagram.com/zancrochet/
Ravelry: https://www.ravelry.com/designers/zan-merry
Pinterest: https://www.pinterest.com/zancrochet/

Jumat, 14 September 2018

Amigurumi Pear

Free Amigurumi pear pattern.

Skill level: Easy/Beginner


Materials needed:
Cotton yarns in green or yellow, dark green and brown
2 mm crochet hook
Polyester fiberfill
Stitch marker for working in the round
Needle for sewing
Scissor

Abbreviations:
sc = single crochet
inc = increase
dec = decrease (2sctog)
st = stitch
ch = chain
R = round/row
FO = fasten off
BLO = back loop only
FLO = front loop only

Note: This project is working in continuous rounds, do not join or turn unless otherwise stated. Mark first stitch of each round.

Pear:
Use green or yellow
R1: ch 2, starting from second chain from hook 6 sc (6)
R2: inc, rep 6x (12)
R3: sc, inc, rep 6x (18)
R4-8: sc around
R9: 2 sc, inc, rep 6x (24)
R10: R5: 3 sc, inc, rep 6x (30)
R11-18: sc around
R19: 3 sc, dec, rep 6x (24)
R20: 2 sc, dec, rep 6x (18)
stuff
R21: sc, dec, rep 6x (12)
R22: dec, rep 6x (6)
F/O


Stem:
Use brown
R1: ch 2, starting from second chain from hook 5 sc (5)
R2-5: sc around
F/O leaving along tail for sewing


Leaf:
Use dark green
R1: ch 2, starting from second chain from hook 4 sc
R2: inc, rep 4x (8)
R3: sc around
R4: sc, inc, rep 4x (12)
R5: sc around
R6: 2 sc, inc. rep 4x (16)
R7: sc around
R8: 2 sc, dec, rep 4x (12)
R9:  sc, dec, rep 4x (8)
R10: dec, rep 4x (4)
F/O leaving a long tail for sewing


Finishing:
  • Sew a stem on pear
  • Sew a leaf beside the stem.
 This pattern is belong to Amigurumi Kitchen, Zan Merry. Please do not claim this pattern as your own. If you wish to share this pattern, you may link this pattern but please do not reprint it to your site. You may keep a copy of this pattern for personal use but you may not sell this pattern. You can sell the items that you made from this pattern.

Please leave comment if you have a question or find any mistake in my pattern. I will do the corrections and answer your question as soon as possible.

Kamis, 30 Agustus 2018

Amigurumi Grapes

Free Amigurumi grapes pattern.
Skill level: Easy/Beginner

Cute bunch of grapes. It is super easy and quick to crochet.


Materials needed:
Cotton yarns in green, purple and brown
2 mm crochet hook
Polyester fiberfill
Stitch marker for working in the round
Needle for sewing
Scissor

Abbreviations:
sc = single crochet
inc = increase
dec = decrease
st = stitch
ch = chain
R = round/row
FO = fasten off
BLO = back loop only
FLO = front loop only


Note: This project is working in continuous rounds, do not join or turn unless otherwise stated. Mark first stitch of each round.

Fruits (make 6):
Use purple
R1: ch 2, starting from second chain from hook 6 sc (6)
R2: sc, inc, rep 3x (9)
R3:  2 sc, inc, rep 3x (12)
R4-6: sc around
R7: 2 sc, dec, rep 3x (9)
stuff
R8: sc, dec, rep 3x (6)
F/O leaving a long tail for sewing

Stem:
Use brown
R1: ch 2, starting from second chain from hook 6 sc (6)
R2: inc, rep 6x (12)
R3-5: sc around
R6: 2 sc, dec, rep 3x (9)
R7-9: sc around
stuff
R10: sc, dec, rep 3x (6)
R11-15: sc around
F/O sew the hole until closed

Leaves (make 2):
Use green
R1: ch 9, starting from second chain from hook, 7 sc, 3 sc in corner, 5 sc
R2: ch 1, turn, FLO, 6 sc, 3 sc in next one st, 6 sc
R3: ch 1, turn, BLO, 7 sc, 3 sc in next one st, 5 sc
R4: ch 1, turn, FLO, 6 sc, 3 sc in next one st, 6 sc
R5: ch 1, trun, 7 sc, sl st
F/O leaving a long tail for sewing

Finishing:
  • Sew the fruits on the stem. Arrange them as you wish.
  • Sew the leaves on stem.

This pattern is belong to Amigurumi Kitchen, Zan Merry. Please do not claim this pattern as your own. If you wish to share this pattern, you may link this pattern but please do not reprint it to your site. You may keep a copy of this pattern for personal use but you may not sell this pattern. You can sell the items that you made from this pattern.

Please leave comment if you have a question or find any mistake in my pattern. I will do the corrections and answer your question as soon as possible.


Jumat, 02 Februari 2018

Little Vegetables 2

Amigurumi Vegetables Part 2
Amigurumi radish, amigurumi corn, amigurumi chili, amigurumi peas

Materials needed:
Cotton yarns in green, light green, yellow, red, white, magenta
2 mm crochet hook
Polyester fiberfill
Stitch marker for working in the round
Needle for sewing
Scissor
Glue

Abbreviations:
sc = single crochet
inc = increase
dec = decrease
hdc- inc = half double crochet increase ( 2 hdc in a stitch)
dc-inc = double crochet increase ( 2 dc in a stitch)
sl st = slip stitch
st = stitch
ch = chain
skp = skip
R = round
CC = change color
BLO = back loops only
FO = fasten off

Note: This project is working in continuous rounds, do not join or turn unless otherwise
stated. Mark first stitch of each round.

Peas in a Pod
Peas (make 2):
Use light green:
R1: ch 2, starting from second chain from hook 6 sc (6)
R2: inc, rep 6x (12)
R3: 3 sc, inc, rep 3x (15)
R4-5: sc around
R6: 3 sc, dec, rep 3x (12)
Stuff
R7: dec, rep 6x (6)
F/O

Pod:
Use green
Ch 16
R1: starting from 2nd chain from hook, 14 sc, 3 sc in corner, continue your work st around the other side of chain, 13 sc, inc in last st. (32)
R2-5: sc around
F/O

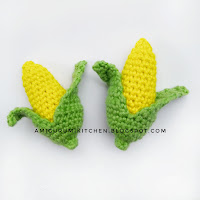
Corn:
Husk:
Use  green:
R1: ch 2, starting from second chain from hook 5 sc (5)
R2: sc around
R3: inc, rep 5x   (10)
R4: inc, rep 10x   (20)
R5-6: sc around
We will divide the Round to be 2 parts. The first side's started from 1st-10th stitches of R6 and the second side started from 11th-20th stitches. Don't cut the yarn.
R7: (ch 1, st st to first st, not counted as sts ), sc in 1st st, sc in each of next 9 sts (10) ch1, turn
R8: sc in each sts     (10) ch1, turn
R9: dec, 6 sc, dec     (8) ch1, turn
R10: sc in each sts    (8) ch1, turn
R11: dec, 4 sc, dec    (6) ch1, turn
R12: sc in each sts    (6) ch1, turn
R13: dec, 2 sc, dec    (4) ch1, turn
R14: sc in each sts     (4) ch1, turn
R15: dec, rep 2x      (2) ch1, turn
R16: sc around    (2) ch1, turn
R17: dec
F/O
Rep R7-R17 to make second husks.
Corn Body/Fruit:
Use yellow
R1: ch 2, starting from second chain from hook 6 sc (6)
R2: inc, rep 6x (12)
R3: sc, inc, rep 6x (18)
R4-5: sc around
R6: 7 sc, dec, rep 2x (16)
R7-8: sc around
R9:  6 sc, dec, rep 2x (14)
R10-11: sc around
R12: 5 sc, dec, rep 2x (12)
R13-14: sc around
stuff
R15: 4 sc, dec, rep 2x (10)
R16: dec, rep 5x (5)
F/O

Finishing: Glue or sew the corn fruit into husk.

Radish:
Use white
R1: ch 2, starting from second chain from hook 4 sc (4)
R2: inc, sc, rep 2x (6)
R3: inc, 2 sc, rep 2x (8)
R4: 3 sc, inc, rep 2 x (10)
R5: 4 sc, inc, rep 2x (12)
R6: sc, inc, rep 6x (18)
R7: 2 sc, inc, rep 6x (24)
R8: CC to magenta, 3 sc, inc, rep 6x (30)
R9-12: sc around
R13: 3 sc, dec, rep 6x (24)
R14: 2 sc, dec, rep 6x (18)
stuff
 R15: sc, dec, rep 6x (12)
R16: dec, rep 6x (6)
F/O

Leaves (make 2):
Use green
ch 9, starting from 2nd chain from hook, 3 sc, inc, hdc-inc, dc-inc, dc-inc, 5 dc in corner, continue your work st around the other side of chain, dc-inc, dc-inc, hdc-inc, inc, 3 sc, sl st to first stitch.
F/O leaving a long tail for sewing.

Finishing: sew both leaves on top of radish

Chilies:
Chili body:
Use red
R1: ch 2, starting from second chain from hook 4 sc (4)
R2: inc, sc, rep 2x (6)
R3: 2 sc, inc, inc, 2 sc (8)
R4-5: dec, sc, inc, inc, sc, dec (8)
R6: 3 sc, inc, inc, 3 sc (10)
R7-8: dec, 2 sc, inc, inc, 2 sc, dec (10)
stuff
R9: 4 sc, inc, inc, 4 sc (12)
R10-11: dec, 3 sc, inc, inc, 3 sc, dec (12)
R12: 5 sc, inc, inc, 5 sc (14)
R13-14:sc around
Stuff
R15: 5 sc, dec, rep 2x (12)
R16: dec, rep 6x (6)
F/O

Calyx: Use Green, ch 2, starting from second chain from hook 8 s, sl st to 1st stich
F/O leaving a long tail fro sewing

Stem: Use green, ch 4, starting from second chain from hook, sl st in each st
F/O leaving a long tail for sewing

Finishing:
Sew the calyx on the chili and sew the stem on the calyx.
This pattern is belong to Amigurumi Kitchen, Zan Merry. Please do not claim this pattern as your own. If you wish to share this pattern, you may link this pattern but please do not reprint it to your site. You may keep a copy of this pattern for personal use but you may not sell this pattern. You can sell the items that you made from this pattern.
Please leave comment if you have a question or find any mistake in my pattern. I will do the corrections and answer your question as soon as possible.

Selasa, 19 Desember 2017

Little Vegetables

Cute amigurumi vegetables...


Abbreviations:
sc: single crochet
hdc: half double crochet
dec: decreasech: chain
st: Stitch
sl st : slip stitch
F/O: Fasten off
CC: change color
Rep: repeat


Materials:
2 mm crochet hook
yarn in various color
Needle for sewing
Stuff
Scissors

Note: Work in continuous round.

Mushroom:
Cap:
Use white
R1: ch 2, starting from second chain from hook 6 sc (6)
R2: inc, rep 6x (12)
R3: sc, inc, rep 6x (18)
R4: sc, inc, [2 sc, inc = rep 5x], sc (24)
R5: 3 sc, inc, rep 6x (30)
R6-7: sc around
R8: sc, dec, [3 sc, dec = rep 5x], 2 sc (24)
R9: CC to brown, work in BLO, 2 sc, dec, rep 6x (18)
R10: sc, dec, rep 6x (12)
stuff
R11: dec, rep 6x (6)
F/O
continue working in Front loop of R8, use white, sc, dec, [2 sc, dec = rep 5x], sc (18)
F/O

Stalk:
Use white
R1: ch 2, starting from second chain from hook 6 sc (6)
R2: inc, rep 6x (12)
R3-5: sc around
stuff, F/O leaving a long tail for sewing

Finishing: sew the stalk to the cap

Tomato:
Use red
R1: ch 2, starting from second chain from hook 6 sc (6)
R2: inc, rep 6x (12)
R3: sc, inc, rep 6x (18)
R4: sc, inc, [2 sc, inc = rep 5x], sc (24)
R5-8: sc around
R9: 2 sc, dec, rep 6x (18)
R10: sc, dec, rep 6x (12)
stuff
R11: dec, rep 6x (6)
F/O
Sepal:
Use green
R1: ch 2, starting from second chain from hook 5 sc (5), sl st to first st
R2: [ch 4,  starting from second chain from hook, sl st, sl st, sc,], sl st  = rep 5x

Finishing: sew or glue sepal on the top of tomato

Carrot:
Use orange
R1: ch 2, starting from second chain from hook 6 sc (6)
R2: sc, inc, rep 3x (9)
R3: sc around
R4: 2 sc, inc, rep 3x (12)
R5: sc around
R6: 3 sc, inc, rep 3x (15)
R7: sc around
R8: 4 sc, inc, rep 3x (18)
R9-14: sc around
stuff
R15: sc, dec, rep 6x (12)
R16: dec, rep 6x (6)

Leaves: MR, ch 4, starting from second chain from hook, sl st in each sts, sl st to MR, ch 5, starting from second chain from hook, sl st in each sts, sl st to MR, ch 4, starting from second chain from hook, sl st in each sts, sl st to MR
Fasten MR
F/O leaving a long tail for sewing

Finishing: sew leaves on carrot


Eggplant:
Use dark purple
R1: ch 2, starting from second chain from hook 6 sc (6)
R2: inc, rep 6x (12)
R3: sc, inc, rep 6x (18)
R4: sc, inc, [2 sc, inc = rep 5x], sc (24)
R5-6: sc around
R7: 4 sc, dec, rep 4x (20)
R8-9: sc around
R10: 3 sc, dec, rep 4x (16)
R11: 2 sc, 4 dec, 6 sc (12)
R12-13: sc around
stuff
R14: dec, rep 6x (6)

Stem:
Use green
R1: ch 2, starting from second chain from hook 4 sc (4)
R2-3: sc around
R4: inc, rep 4x ( 8)
R5:[ch 4, starting from second chain from hook, sl, sc, hdc], sl st, repeat 4x
F/O leaving a long tail for sewing

Finishing: sew stem on eggplant

Leeks:
Small Leek:
Use white
R1: ch 2, starting from second chain from hook 6 sc (6)
R2: inc, rep 6x (12)
R3: sc around
R4: 2 sc, dec, rep 3x (9)
R5: CC to light green, sc around (9)
stuff
R6: sc, dec, rep 3x (6)
R7: CC to dark green, sc around
R8: BLO, sc around
Now continue making the leaves, we will divide the stitches of R7 and R8 into 2 sides
1st leaf:
Row1: sc in each of next 3 sts,
Row 2-5: ch 1, turn, sc in each sts
F/O
Continue working in the 4th-6th sts of R8, repeat first leaf steps to make 2nd leaf
3rd leaf:
Start working from front loop of 1st-3rd sts of R7
Row1: sc in each of next 3 sts,
Row 2-7: ch 1, turn, sc in each sts
F/O
Continue working in the 4th-6th sts of R7, repeat 3rd leaf steps to make 4th leaf
Give a little sew to close the hole.

Big Leek:
Use white
R1: ch 2, starting from second chain from hook 6 sc (6)
R2: inc, rep 6x (12)
R3: sc, inc, rep 6x (18)
R4: sc around
R5: sc, dec, rep 6x (12)
R6: sc around
R7: 2 s, dec, rep 3x (9)
R8: sc around
R9-10: CC to light green, sc around (9)
R11: 7 sc, dec, (8)
R12: CC to dark green, sc around (8)
R13: BLO, sc around
Now continue making the leaves, we will divide the stitches of R12 and R13 into 2 sides
1st leaf:
Row1: sc in each of next 4 sts,
Row 2-5: ch 1, turn, sc in each sts
F/O
Continue working in the 5th-8th sts of R13, repeat first leaf steps to make 2nd leaf
3rd leaf:
Start working from front loop of 1st-4th sts of R12
Row1: sc in each of next 4 sts,
Row 2-7: ch 1, turn, sc in each sts
F/O

Continue working in the 5th-8th sts of R7, repeat 3rd leaf steps to make 4th leaf
Give a little sew to close the hole.

This pattern is belong to Amigurumi Kitchen. Please do not claim this pattern as your own. If you wish to share this pattern, you may link this pattern but please do not reprint it to your site. You may keep a copy of this pattern for personal use but you may not sell this pattern. You can sell the items that you made from this pattern.

Please leave comment if you have a question or find any mistake in my pattern. I will do the corrections and answer your question as soon as possible.